Welding Symbols are fundamentally used to describe weld requirements on engineering drawings. The primitive sign consists of an arrow pointing towards the joint, reference line and tail for process requirements. Key components such as weld type (fillet, grove) and conveyed prominently as designated by the symbol along the reference line, with elements such as size, length and contour. Position up or down the line to denote the arrow or non arrow side of a joint. To avoid this, additional means of indicating finishing, well-all-around or filed welds are used. This simple set system enables efficient transmission of weld joint geometry, preparation and quality specification from designers to welders.
What Are Welding Symbols?
Welding symbols are a graphical way of communicating the requirements of a welding process on an engineering drawing. Regulated by specifications such as AWS A2.4 and ISO 2553 with clear instructions and without any long winded explanations. A simple welding symbol comprises a reference line, arrow to point the joint and tail to specify the welding process. Symbols on the line specify the weld (fillet, grove, plug). Further features indicate the size, length, profile, finish and whether the weld is in a workshop or on site, meaning designers are speaking the same language as welders.
Meanings of Welding Symbols
Welding symbols, which are standardized by coding standards AWS A2.4 and ISO 2553, are a useful shorthand language on drawings when dimensioning is not used. They clearly define not only what type of weld to make, but also its size, where it should be located and more.
The fundamental symbol is an arrow pointing to the joint on a reference line. The odor of the symbol shows the type of weld (such as fillet, groove or plug). Its position on the line indicates the arrow side or non-arrow side. Additional information includes dimensions (lens length, depth), finish, contour and process. The tail imparts some detail such as the type of welding that was used.
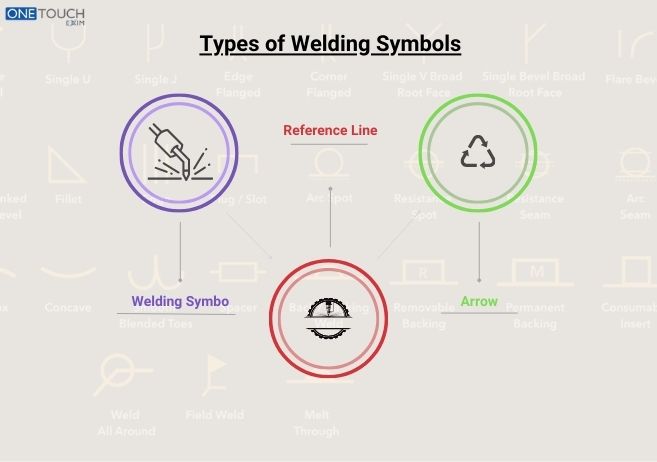
Types of Welding Symbols
There are various types of welding symbols that are divided into the joint and the weld. Groove weld symbol: A groove weld symbol may be above or below the reference line in a groove weld (e.g. square, V, Bevel, U, J) and plug or slot weld symbol and is a type of weld symbol. Fillet Weld Symbols are used to join surfaces, and the symbol is a right angle triangle. Plug and slot welds indicate a hole filled in one part to join it to another. There are additional symbols that give more information such as weld-all-around or field weld. All together, these symbols combine to represent a specific weld that communicates to the welder precisely what the weld should be.
Basic Welding Symbols
Basic Welding Symbols are the standard method of indicating weld requirements on engineering drawings. At its essence, the symbol is a horizontal level line attached to an arrow that points to the joint. The type of weld to be used is also shown by a simple line placed on – a triangle (welding symbol type of bend) indicates a fillet weld, a single-V shape indicates a V-groove weld, and a rectangle signifies a plug or slot weld. Position of the symbol (below or above the reference line) indicates which side of the joint should be welded. More numbers and smaller symbols are added to indicate the size, length etc.
Supplementary Symbols
Supplementary Symbols are paired with basic weld symbols to provide more direction. Common examples are the circle meaning the weld must fully encircle the joint, signifying a well-all-around. A flag indicates field work as opposed to shop labor, representing a weld done on site. A flush or flat contour symbol necessitates the finished weld neatly matches the base materials plane while a convex requires a raised area. Other symbols point out melt through or the need for a backing bar. These crucial welds require communication of exactly where and how they attach as well as the desired final profiles to guarantee structural integrity. Complex welds join metal in vital ways and symbols ensure construction is as planned.
Combination Symbols
A combination symbol provides a complete set of instructions to define a weld seam. It starts with a basic reference line and an arrow pointing to the joint location. At the core it is a fundamental weld symbol like a fillet triangle or groove V. Supplementary marks like an encircling loop or filed weld flag are then joined. Dimensional specifics are contributed for size, length, and pitch. Details in the tail disclose the welding process and any ending steps. Sometimes a more involved symbol incorporates multiple references and welds with dissimilar designations requiring the welder to amalgamate the assorted directives. This inclusive rendering acts as a solitary blueprint for the welder to replicate the designated fusion.
Conclusion
Welding symbols comprise a precise, universal language integral to lucid communication in fabrication. These signs convey key details regarding joint varieties, supplemental directions and intricate combinations, thereby guaranteeing each weld is carried out accurately, uniformly and safely. By imparting critical specifics pertaining to style, measurements, placement and conclusion immediately on technical drawings such signs serve as an indispensable instrument for upholding quality, productivity and strength in manufacturing and building ventures worldwide.